
I am so happy to see many of you found the last blog post by my dear friend Nouf useful. She really is an inspiration for those of us still contemplating on getting started with yoga (click here if you missed it). When can I start? Do I need new clothes? Where can I practice? If daunting questions like these are swimming through your head, Nouf is back with more tips on how to get started. Go on, have a read… and hopefully I’ll see you stretching into an asana soon!

Photo credit: Pablo Bori @PBorip
How Do I Start Practicing Yoga? Handy Tips from Nouf
I’m often asked what’s the best way to begin a yoga practice. I honestly don’t think there is one best way. What’s important is to begin a practice.
What’s beautiful about yoga is that anyone, anywhere can do it. You don’t need much to practice. You just need yourself and that’s about it.
People ask, “what about the clothes? I don’t have work out or yoga clothes so I can’t do yoga yet.” Huh? No. You don’t need “yoga clothes”. There is no such thing as “yoga clothes”. You can do yoga in whatever you are wearing. I’ve done yoga in my PJs, and I even once did yoga in a dress. Ok, it wasn’t as comfortable to do it in a dress, but there is no uniform or outfit that must be worn in order to practice. Rule of thumb is, wear whatever makes you feel comfortable. Anything that allows freedom of movement and doesn’t bother you. Let me just come out and say it, I love clothes. I can’t help it. I love clothes. Jackets used to be my guilty pleasure until I discovered the fabulousness of leggings. I can’t stop. I just love leggings. But owning a legging collection does not a yogi make! Far from it. It just means that I love leggings.
“What about equipment? I don’t have a sticky mat to practice yoga.” So? You don’t need a yoga mat. Do you have a carpet? A towel? Grass? Sand? Even the floor is fine to do yoga. Ok, so laying down with your face against the ground might not appeal to some, or the floor might hurt someone’s knees, sit bones etc… That’s ok, just fold a towel under. Sit on a small pillow or blanket. Once you see you are enjoying your practice and would like to continue doing yoga, then OK, get yourself a mat, but you don’t really need one to begin your journey.
“Do I have to go to a class?” I don’t have a studio close to where I live.” You don’t need to sign up to a class to begin your practice. There are many guides out there that can help you. Videos online are a great way to start. I highly recommend Erin Motz’s 30 Day Challenge. It’s short, sweet and to the point. It’s a great way for someone who is not familiar with yoga to begin. She has a knack to make yoga accessible and easy to everyone. Give that a try and see for yourself.
I am a firm believer however, that you must go to class in order to progress in your practice. Home practice, or online classes, or DVD’s or books, aren’t enough. They are a great way to start but there is nothing like having someone with the knowledge and experience correcting you or advising you. When you are alone at home, you can’t really see yourself, so you don’t know if you are doing the pose correctly. Only an experienced teacher can help you there.
Finding the right teacher is the key for you to advance in your journey. The right teacher will motivate you to continue with your practice and would make you look forward to attending classes. You might be lucky and find your teacher when you attend your first yoga class, or it may take you several classes in different studios until you find the right one. I was lucky enough to have found my teacher Sue Flamm in the very first class I went to. The more classes I attended taught by other teachers, the more confident I became that she was MY teacher. Her way of teaching, her style of yoga, her generosity and love were the right fit for me. Go out and find YOUR teacher.
Once you begin practicing you will find poses you’ll love and poses you won’t like that much. One of my favourite poses is Low Lunge, traditionally in Sanskrit it’s Anjaneyasana. I like how it encompasses several elements like balance, stretching, back arching and strength. It also feels great.
Here’s how I do this pose (keep in mind I am not a certified teacher. I wouldn’t like to give the impression as if I were teaching you how to do this pose, because that is far from the truth. It’s me sharing my experiences and how I do poses. I am also a student, still learning ❤ ).
- I get into this pose differently, usually from Downward-Facing Dog (Adho Mukha Svanasana). However an easier way to get into it is from Mountain pose (Tadasana):
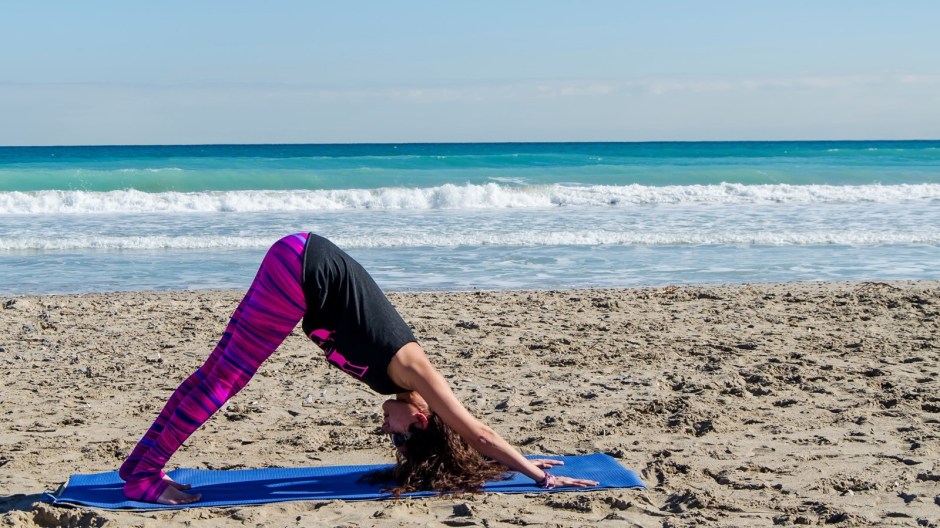
Photo credit: Pablo Bori @PBorip
2. Standing with the feet together, arms on the sides, inhale and at the exhale, step your left leg all the way to the back. Right leg remains facing forward. Both hips facing forward.
3. Inhale and at the exhale, bend your right leg making sure your knee doesn’t go over your ankle (that’s very important, otherwise you might injure yourself). Bring your left knee to the ground, stretching your leg as far back as it feels comfortable. You can keep your toes flat against the ground or if you find it hard to maintain your balance, tuck them under.
4. Inhale and bring your torso up, lifting from the hips. Try getting your tailbone down toward the ground. To keep your balance in check, squeeze your thighs inwards, as if you would like to bring them to the center while you are lifting your hips. If you are doing fine, sweep your arms up. If you are wobbly, that’s ok, keep your hands on the ground at the sides for support. You can put books underneath your hands if you can’t reach the ground.
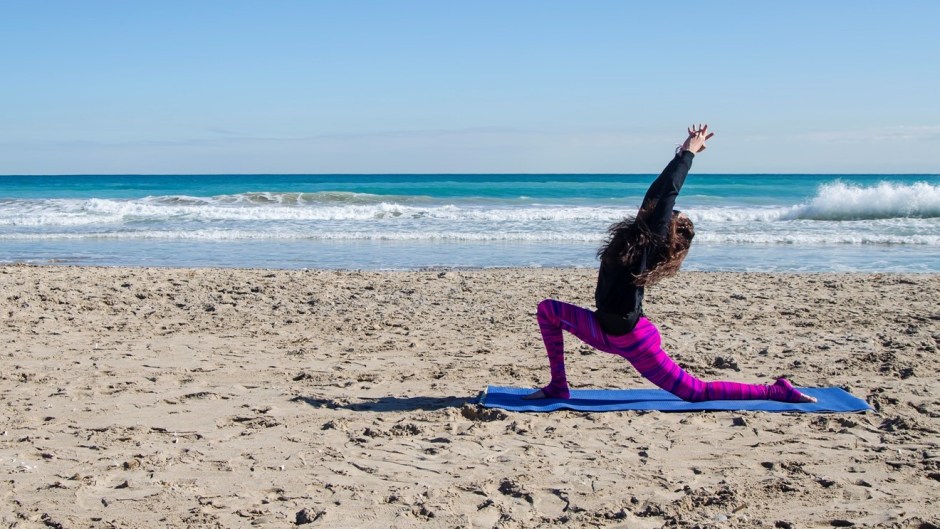
Photo credit: Pablo Bori @PBorip
5. Exhale and lift your chest, up, up, up into the sky. Don’t try to arch your back. The movement comes from opening the chest, not dropping back. You can hurt your back if you compress your spine. Bring your shoulders down and draw your shoulder blades towards each other. If you are doing ok, drop your head back and look up into the sky. Don’t hurt your neck. Stretch your arms up, up into the sky. Exhale and feel the yummy stretch. Surrender to the moment. Take a couple rounds of breaths in and out. I like to do 10 rounds myself, but any amount is good.
6. When you are ready to come out of this pose, bring your hands on each side of your right foot, then slowly, un-tuck your toes and bring your left leg forward next to the right. Stand up in Mountain pose again and take a breath in and out. Relax. Feel your body and yourself getting entered again. Now repeat on the left side. Remember to always breathe from your nose, in a slow controlled manner. You don’t want to get dizzy.
Each person feels each pose differently. You might feel the stretch in your thighs or in your hips, or the sides of your torso. There is no right way to feel the pose. There is a wrong way however. There must be no pain at all. If there is pain, stop. Don’t stress the knees, back or neck. The pose must feel delicious, not painful. It isn’t an easy pose, nor very advance one. You will feel your thighs and abs working, believe me. But it shouldn’t feel unbearable. Remember to do it slowly and not force the movement. B.K.S. Iyengar said “Nothing can be forced, receptivity is everything.” So go slow and easy. Enjoy the pose. Be where you are, not where you think you should be.
Welcome to Yoga.

